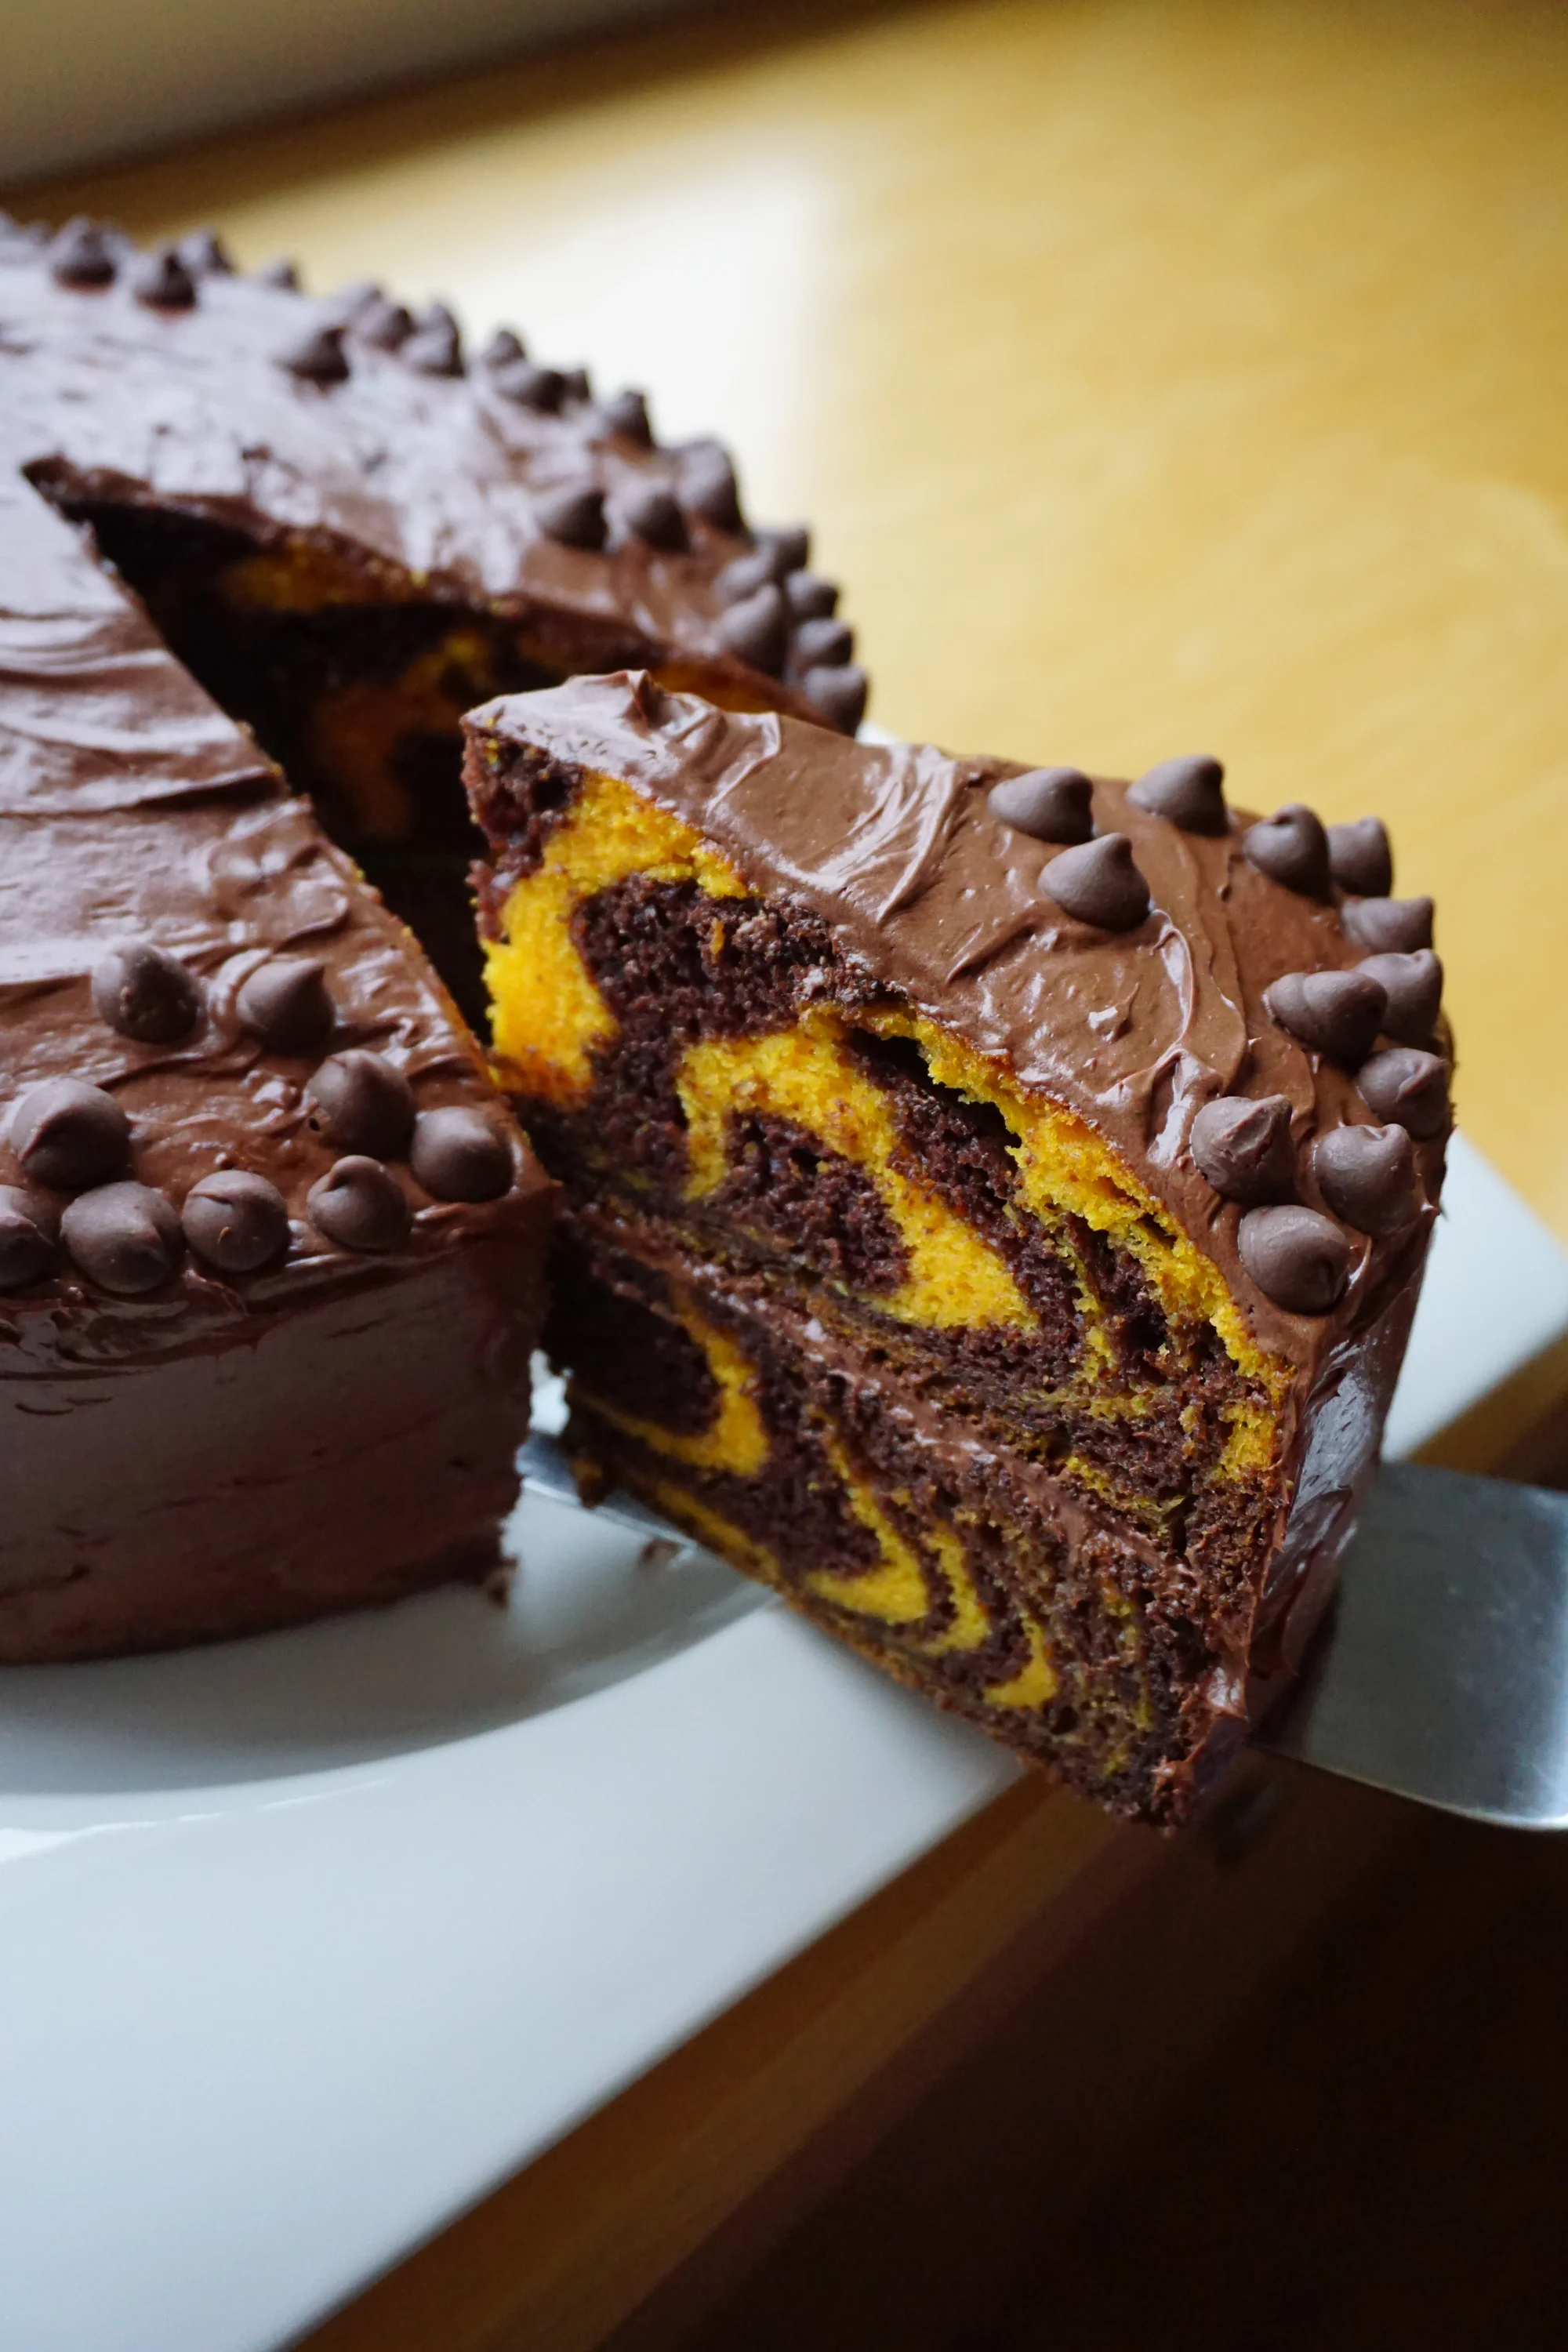
Ridiculously Easy Black & Orange Marbled Cake

It’s #OrangeOctober, my favorite month of the year. October brings the start of the fall holidays, colder weather, Halloween, and my birthday as well! Our #SFGiants have made it to the #NLCS and San Francisco is lit up in orange. It’s a beautiful thing. #EvenYear
A few weeks ago I started to rack my brain for fun #Halloween tutorials to do, since it’s one of the funnest DIY holidays of the year. However, I realized that I’m not really into spooky, gross looking treats. I love the creativity of Halloween, and wanted to come up with a fun, simple, and even…elegant dish for this ghouly holiday.
Marbled cake is beautiful and so easy to bake. I was so happy with how this cake turned out! I decided to surprise him by icing the entire cake in whipped chocolate frosting, only to reveal the wavy black & orange marbled cake once I sliced it up.
Another topic I wanted to share with you guys is how to dress up boxed cake mix! By replacing water with milk, adding an egg, and replacing oil with double the butter, you can doctor up simple boxed cake mix. Cuz let’s face it - I’m not a baker. I really love to cook, but I don’t like messing with the science of baking. These little replacements are much richer, yes, (I mean, all that butter is crazy), but so delicious and raises the ante a bit. Enough talking, let’s get cooking :)
What You Need:
You will need 1 box of cake mix for one layer of cake. I chose to make 2 layers of cake, so I used a white cake mix, and a Devil’s Food cake mix.
Each cake mix will be divided in half. You will use half of the white cake mix with food coloring, and half of the Devil’s Food cake mix for one layer, and the other halves for the second layer. I hope that’s not confusing.
- 1 box chocolate cake mix
- 1 box white cake mix (actually, don’t buy Funfetti bc I had to sift alllllll the sprinkles out of it)
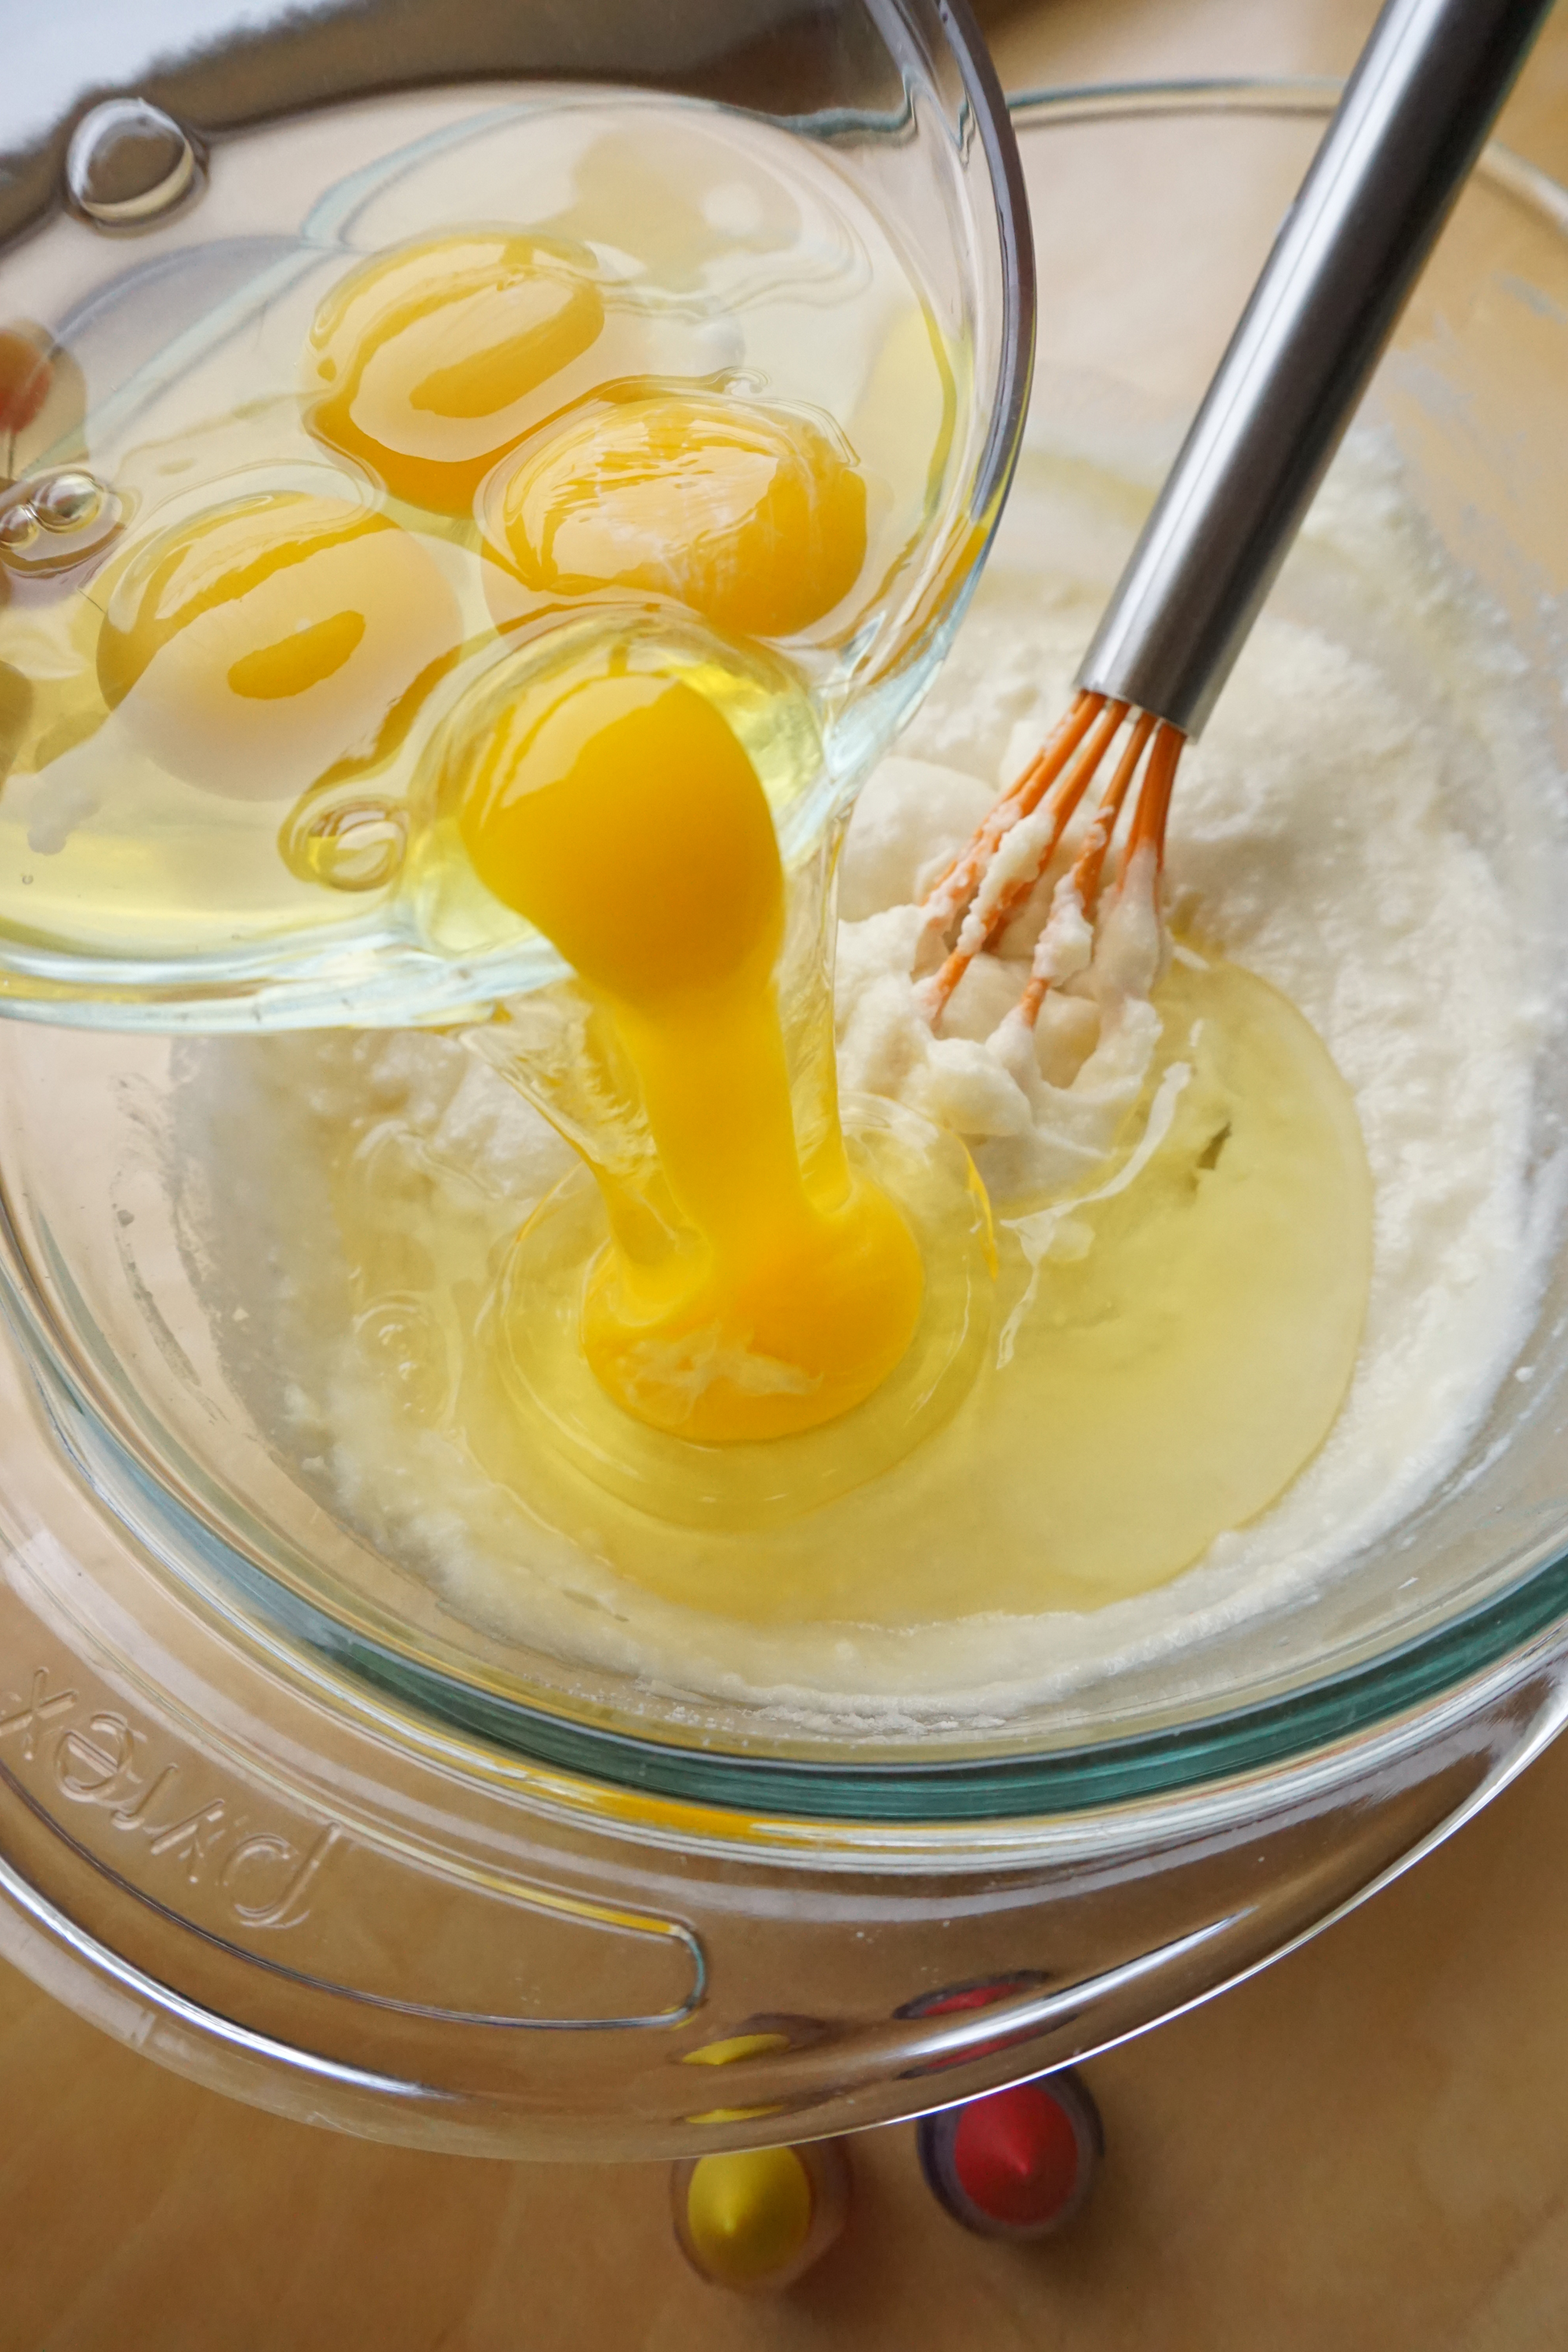
- Enough eggs for each box’s recipe, plus 1 egg per box mix. (Pillsbury Devil’s Food box mix calls for 3 eggs, so use 4. Same goes for the white cake mix.) - 8 eggs total
- Red and Yellow Food Coloring
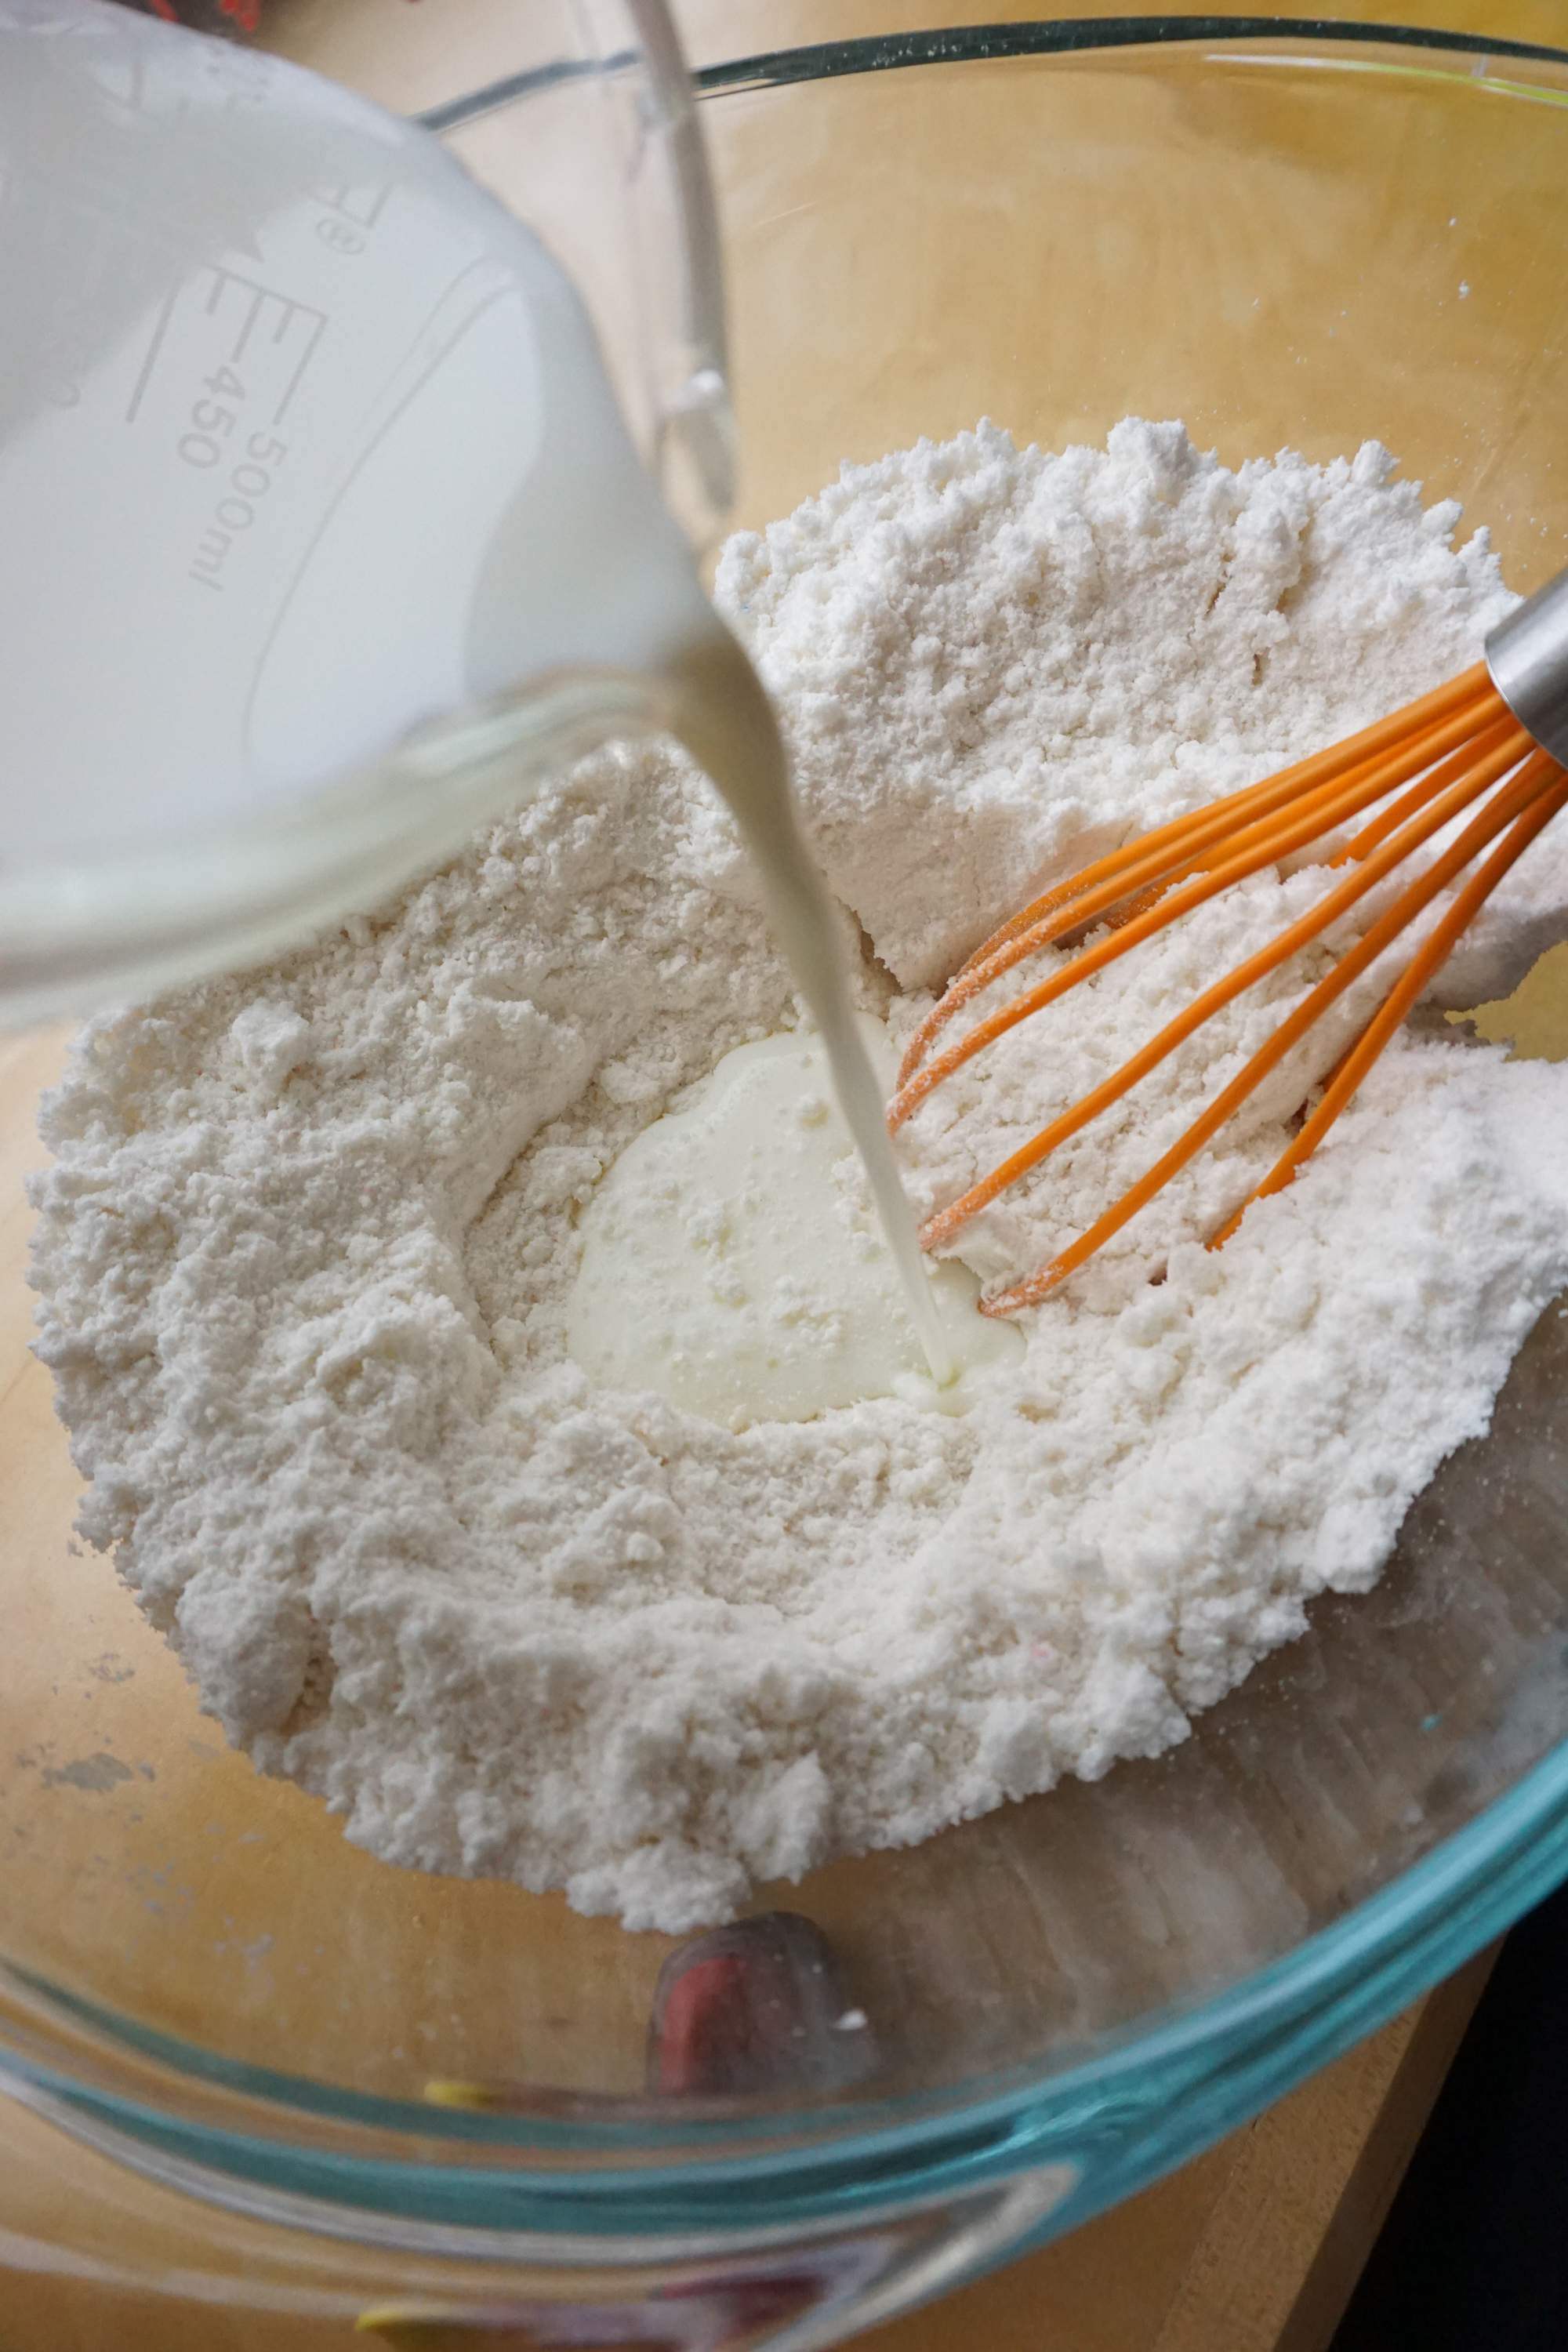
- Enough milk for each box’s recipe. The milk will replace the water in the recipe. I used 1 cup of milk for each box.
- Double the amount of butter (melted) to replace the oil in the recipe. If it calls for ½ cup of oil, use 1 cup of butter. Yeah. One cup of butter.
- 2-8” round nonstick baking pans
- Frosting and decorations of your choice/offset spatula
- Cooling rack/parchment paper

What To Do:
- Preheat your oven to 350F.
- Gather all your ingredients and supplies. You’ll need 4 large bowls for your batter.
- Bowl 1:
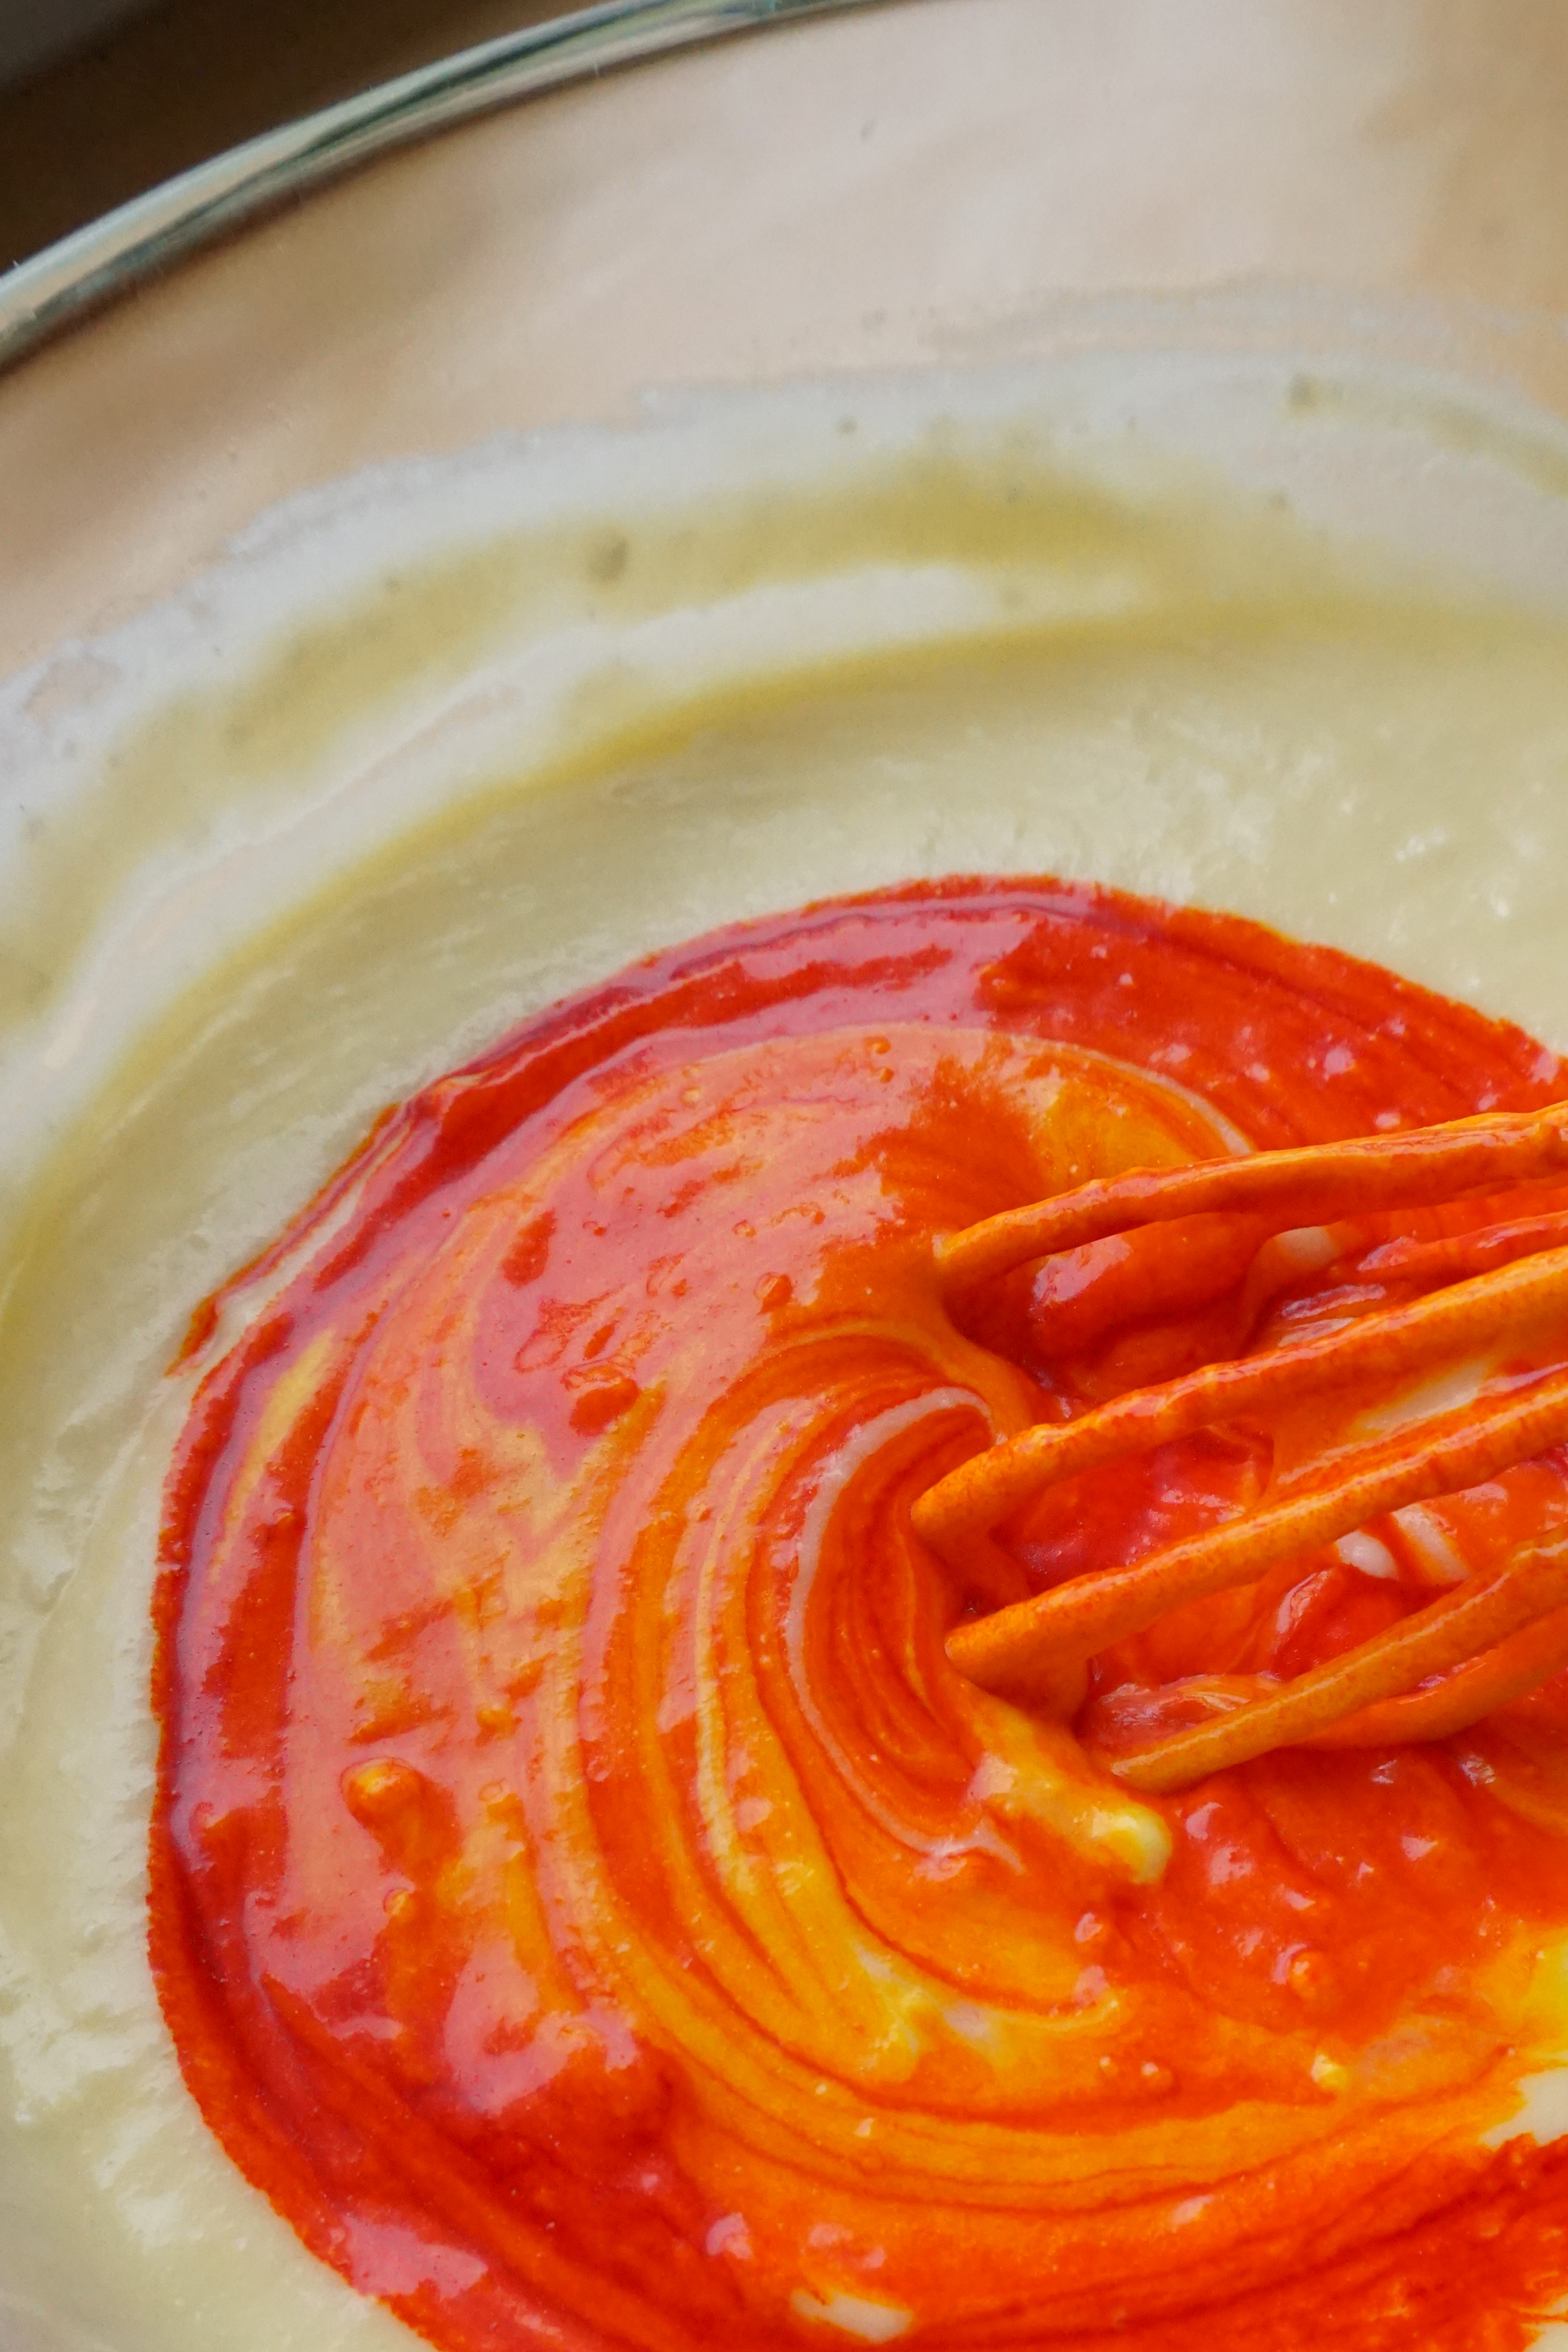
Add your white cake mix, 4 eggs, 2/3 cup melted butter, 1 cup milk. Whisk together until lumps are gone and it’s smooth. Drop in 50 drops of yellow food coloring, and 8 drops of red food coloring. If you want it to get more intense, keep adding food coloring in a 5/1 yellow/red ratio.
Separate half of this orange batter into one of the separate bowls.
- Bowl 3:
Mix the chocolate or Devil’s Food cake mix, 4 eggs, 1 cup melted butter, 1 cup milk. Whisk until smooth. Separate half of this batter into bowl 4.

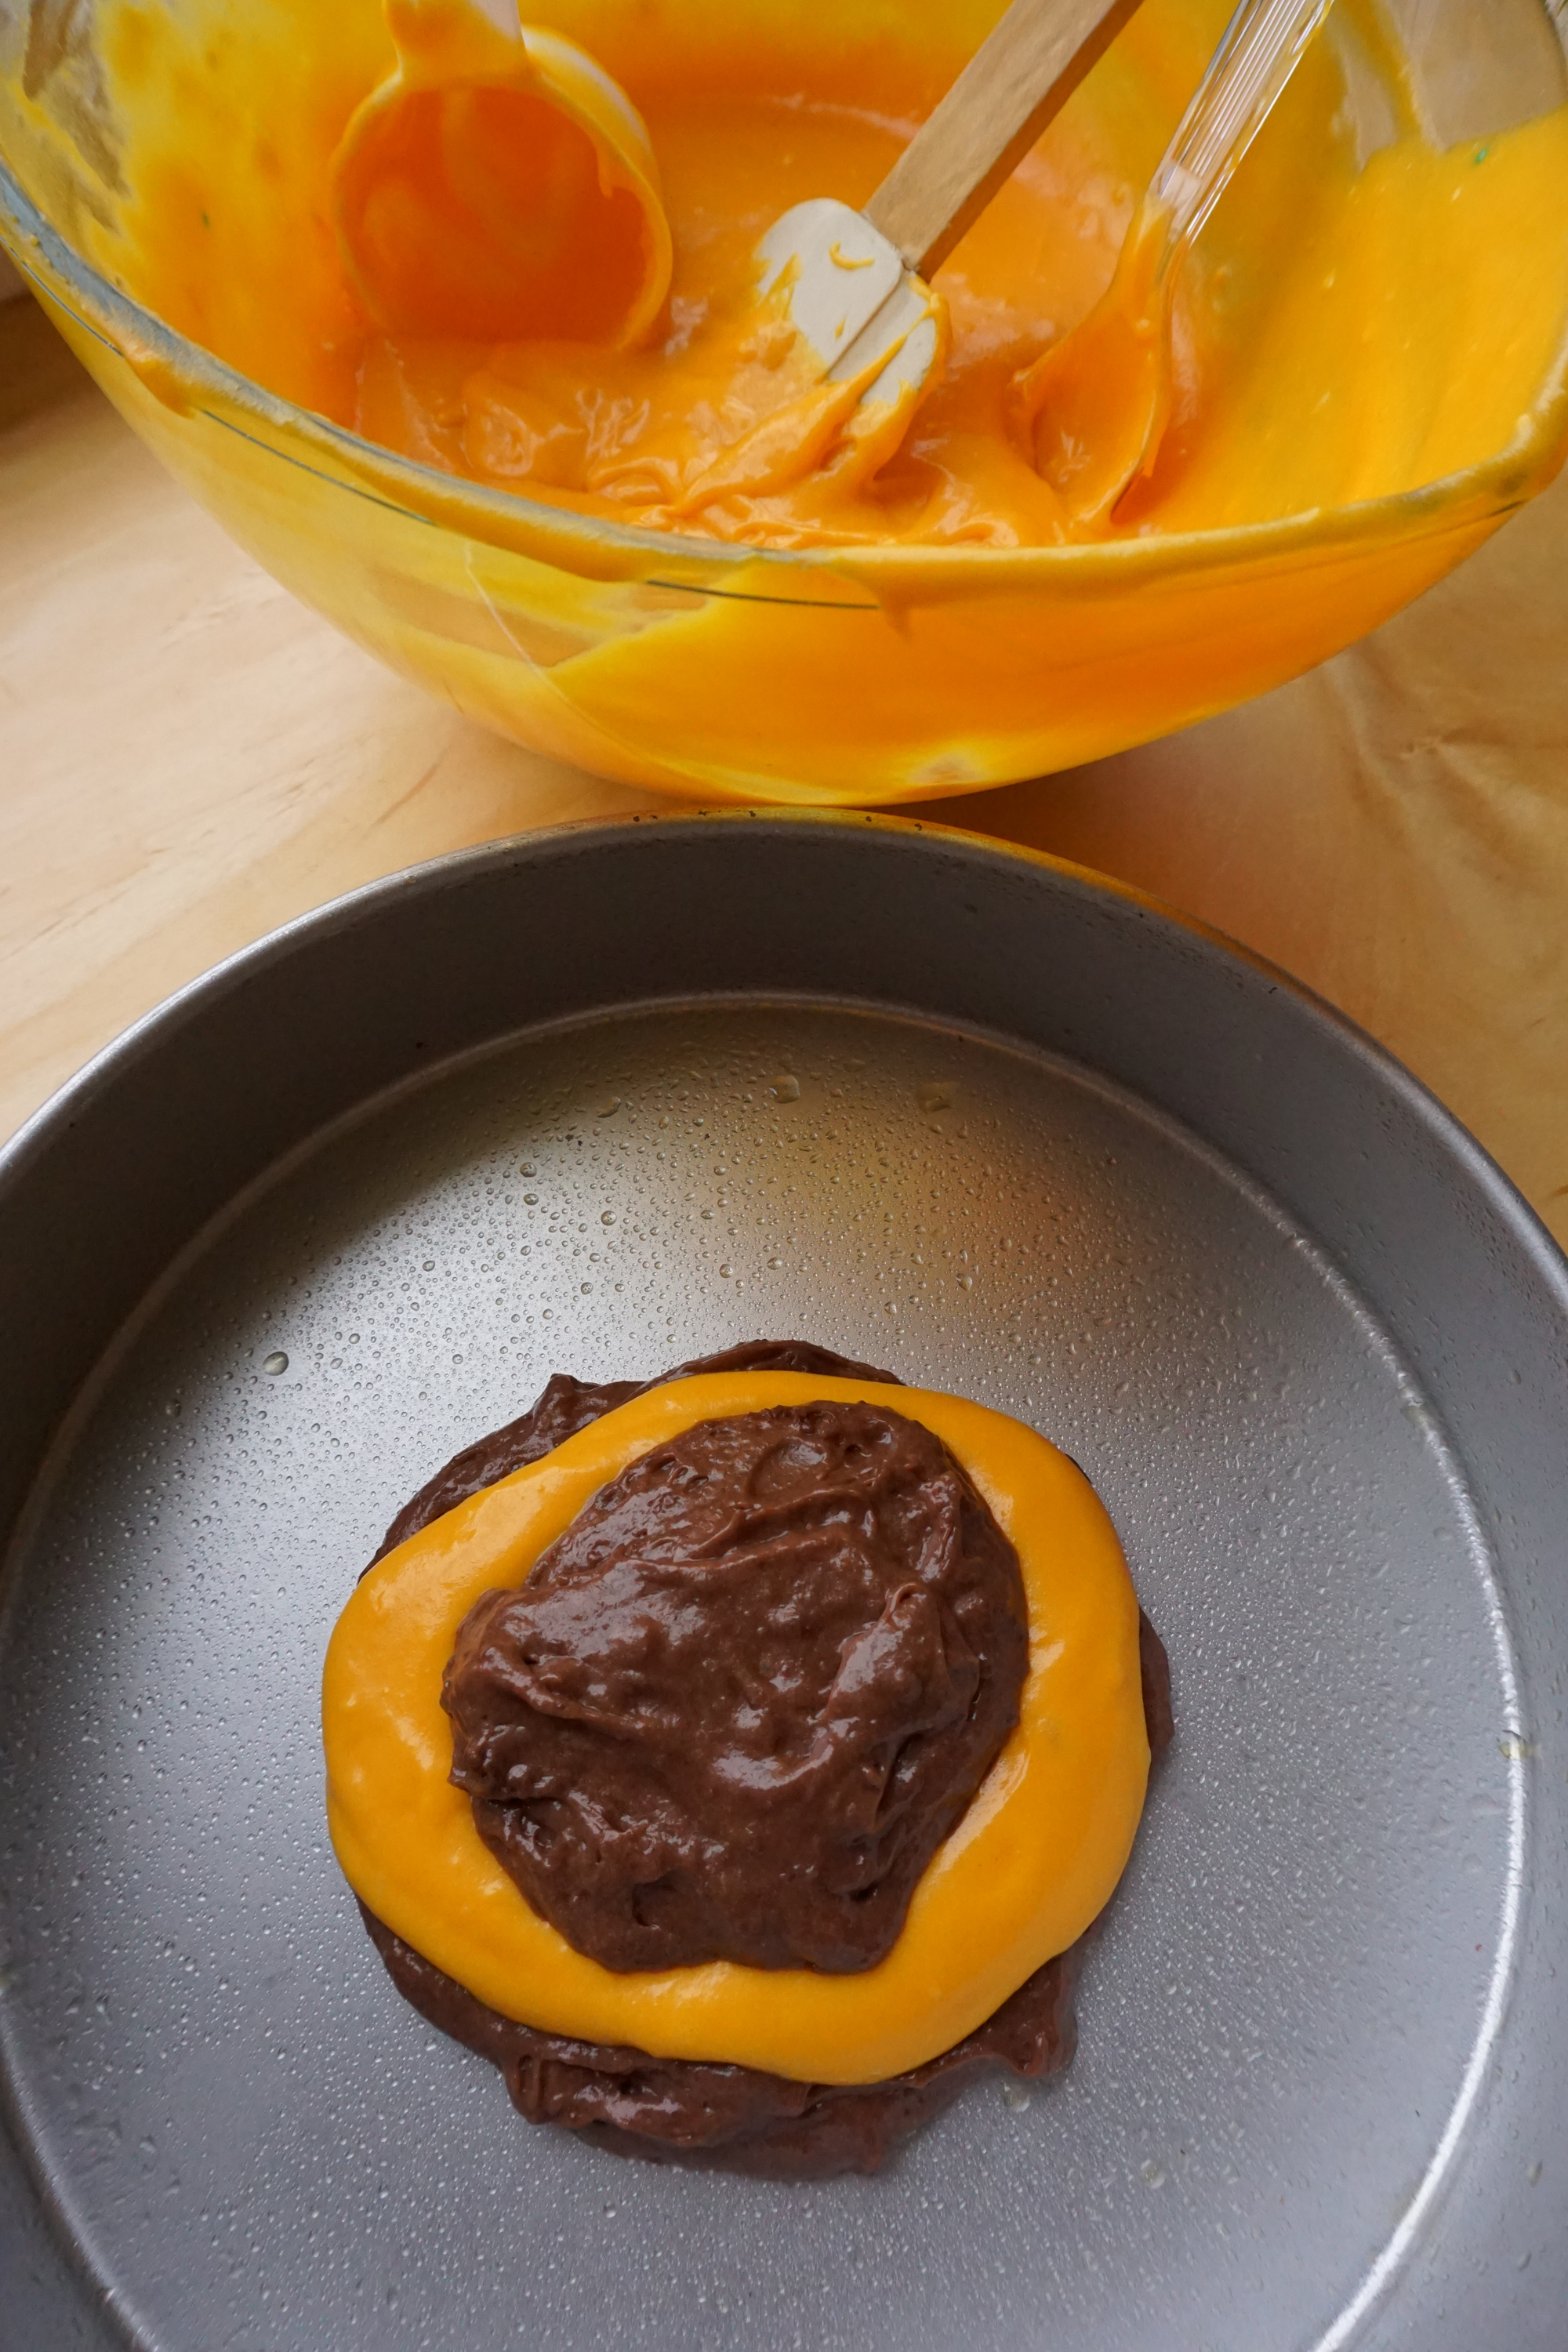
- Spray your two nonstick round pans with cooking spray. Start with one baking pan, one bowl of chocolate batter, and one bowl of orange batter. Put everything else aside.
- It’s best to use a ¼ cup measuring cup for distributing the batter. The measuring cup ensures the same amount of batter each time. I had a ¼ cup measuring cup in each of the batters to keep them nice and separate. Now to create the marble:
- In the first baking pan, place a ¼ cup scoop of chocolate batter. I used a plastic spoon to help the batter out of the cup. This is to lessen the amount of utensils to clean up. Next, dump a ¼ cup scoop of orange batter right on top of the chocolate. Don’t touch it, don’t move it, don’t prod it, just leave it be. Even if it doesn’t flatten out - it’s ok. Continue by alternating chocolate and orange batter scoops until you’ve finished all the batter. They will flatten out by themselves. They don’t have to be perfect either!
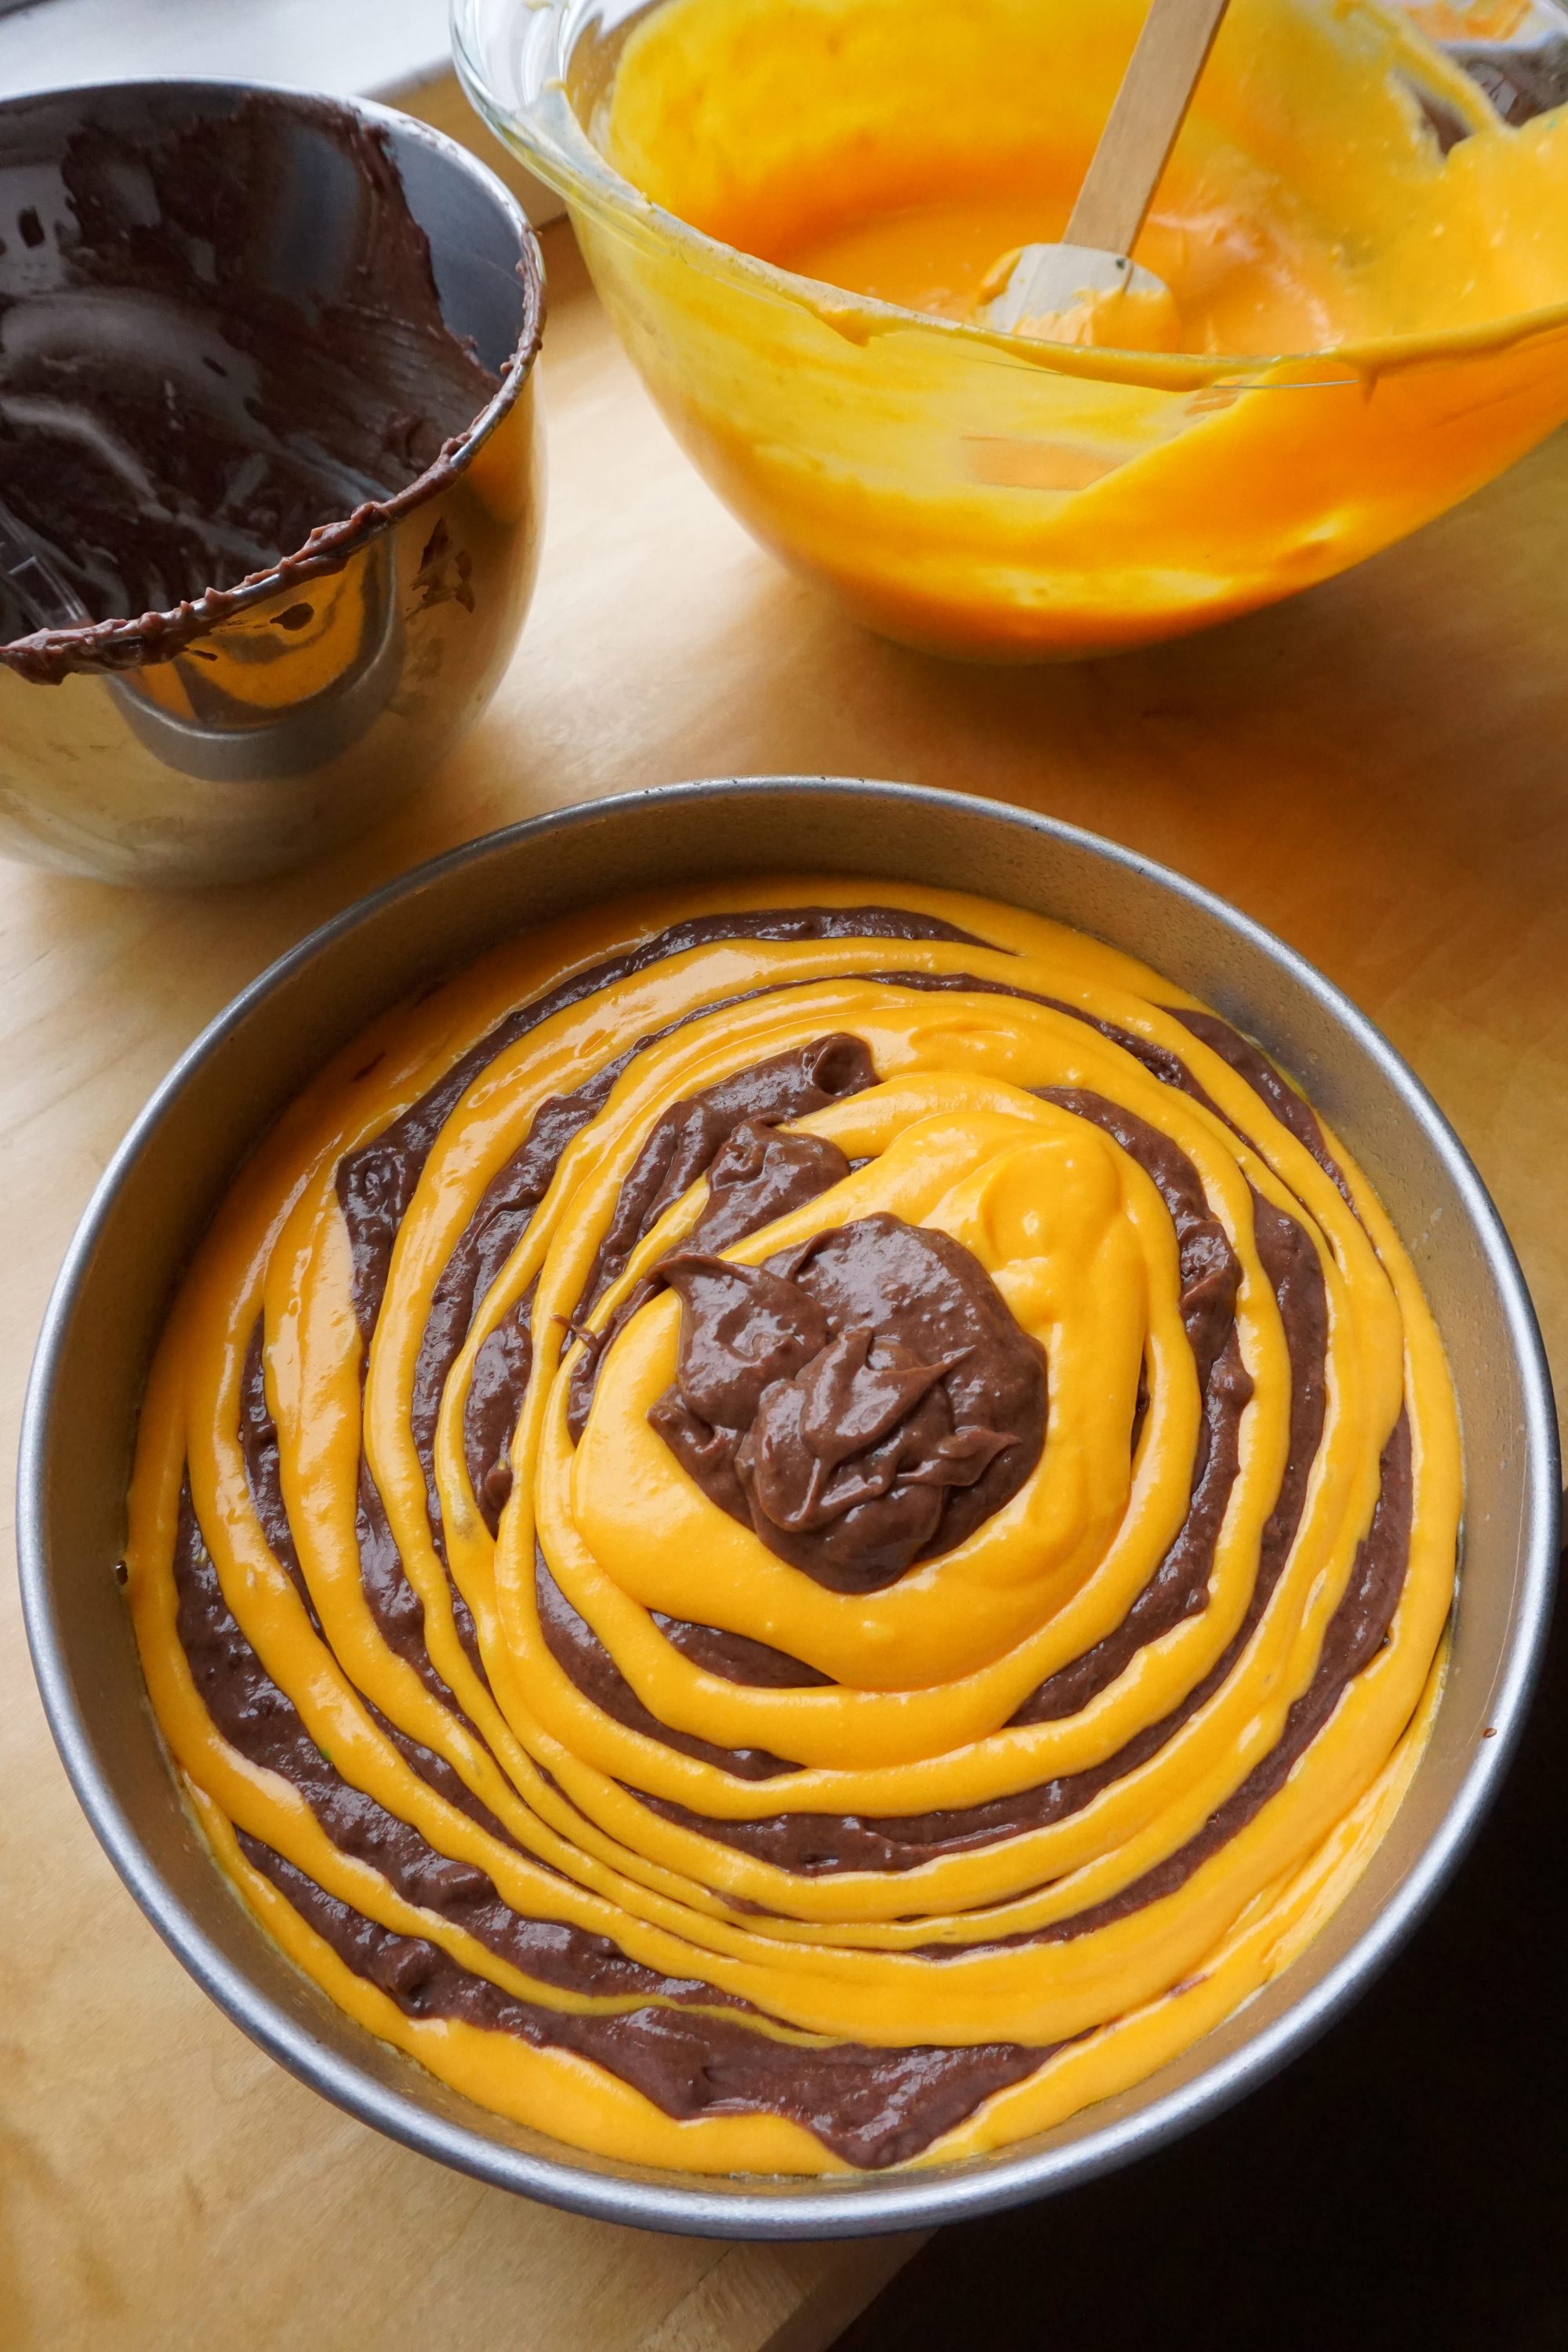
It should look like this.

- Do the same with the other halves of your batter.
- Bake them as directed for 34-38 minutes at 350F. Ensure they’re baked thru by placing a toothpick in the center. It should come out clean.
- Allow them to cool on a wire rack. For this cake, I wanted to level off one layer of cake to use for the bottom, and keep the other cake with its beautifully domed top.

- If you’re going to level off one of your cake layers, wait until it is completely cooled and use a large serrated knife.

I kept all the trimmings to snack on :)

- Tear off 3-4 pieces of parchment paper and place them in an overlapping triangle on the serving dish of your choice. This will help you keep your serving plate clean as you frost your cake! :) Simply pull them out from under the cake later.
- Use an offset spatula to frost the bottom layer of your cake. You will often hear of a “crumb coat.” That’s the initial, thin layer of frosting that allows your cake to have a smooth finish. The first coat of frosting or icing will “glue” down any crumbs. This way, when you’re icing your cake later, you won’t tear the surface.
- That being said, I skipped that step. Hahaha
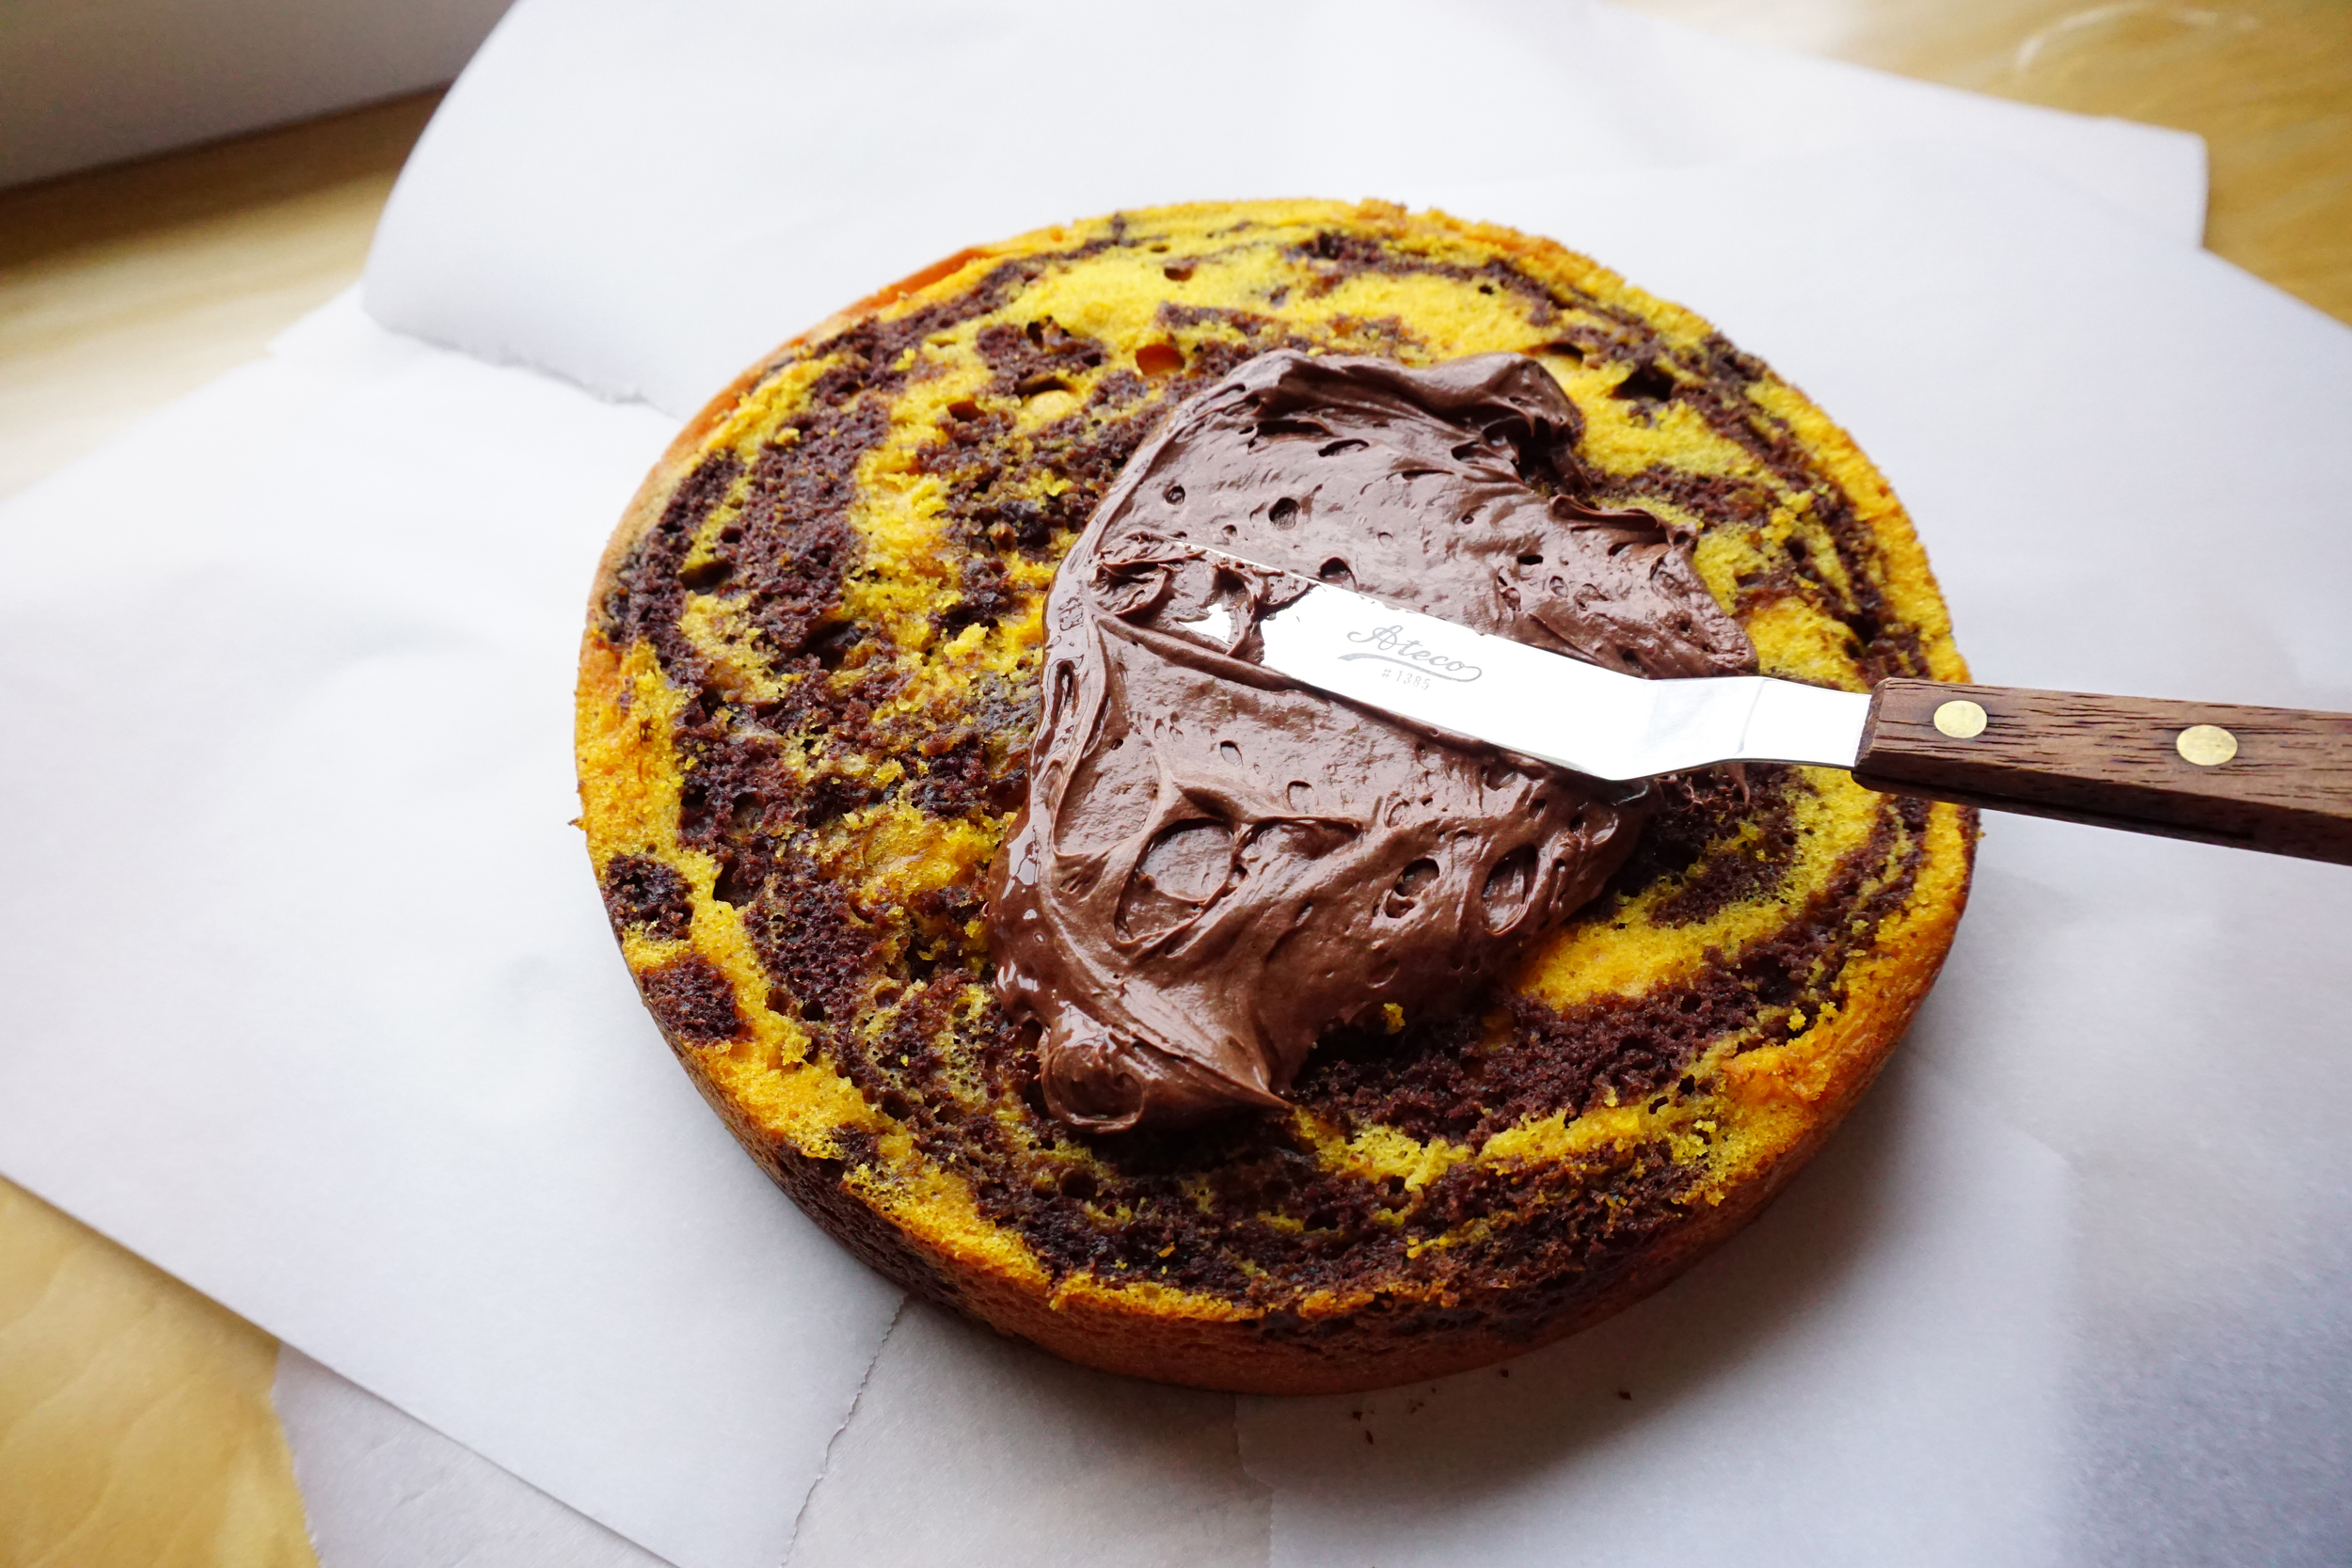
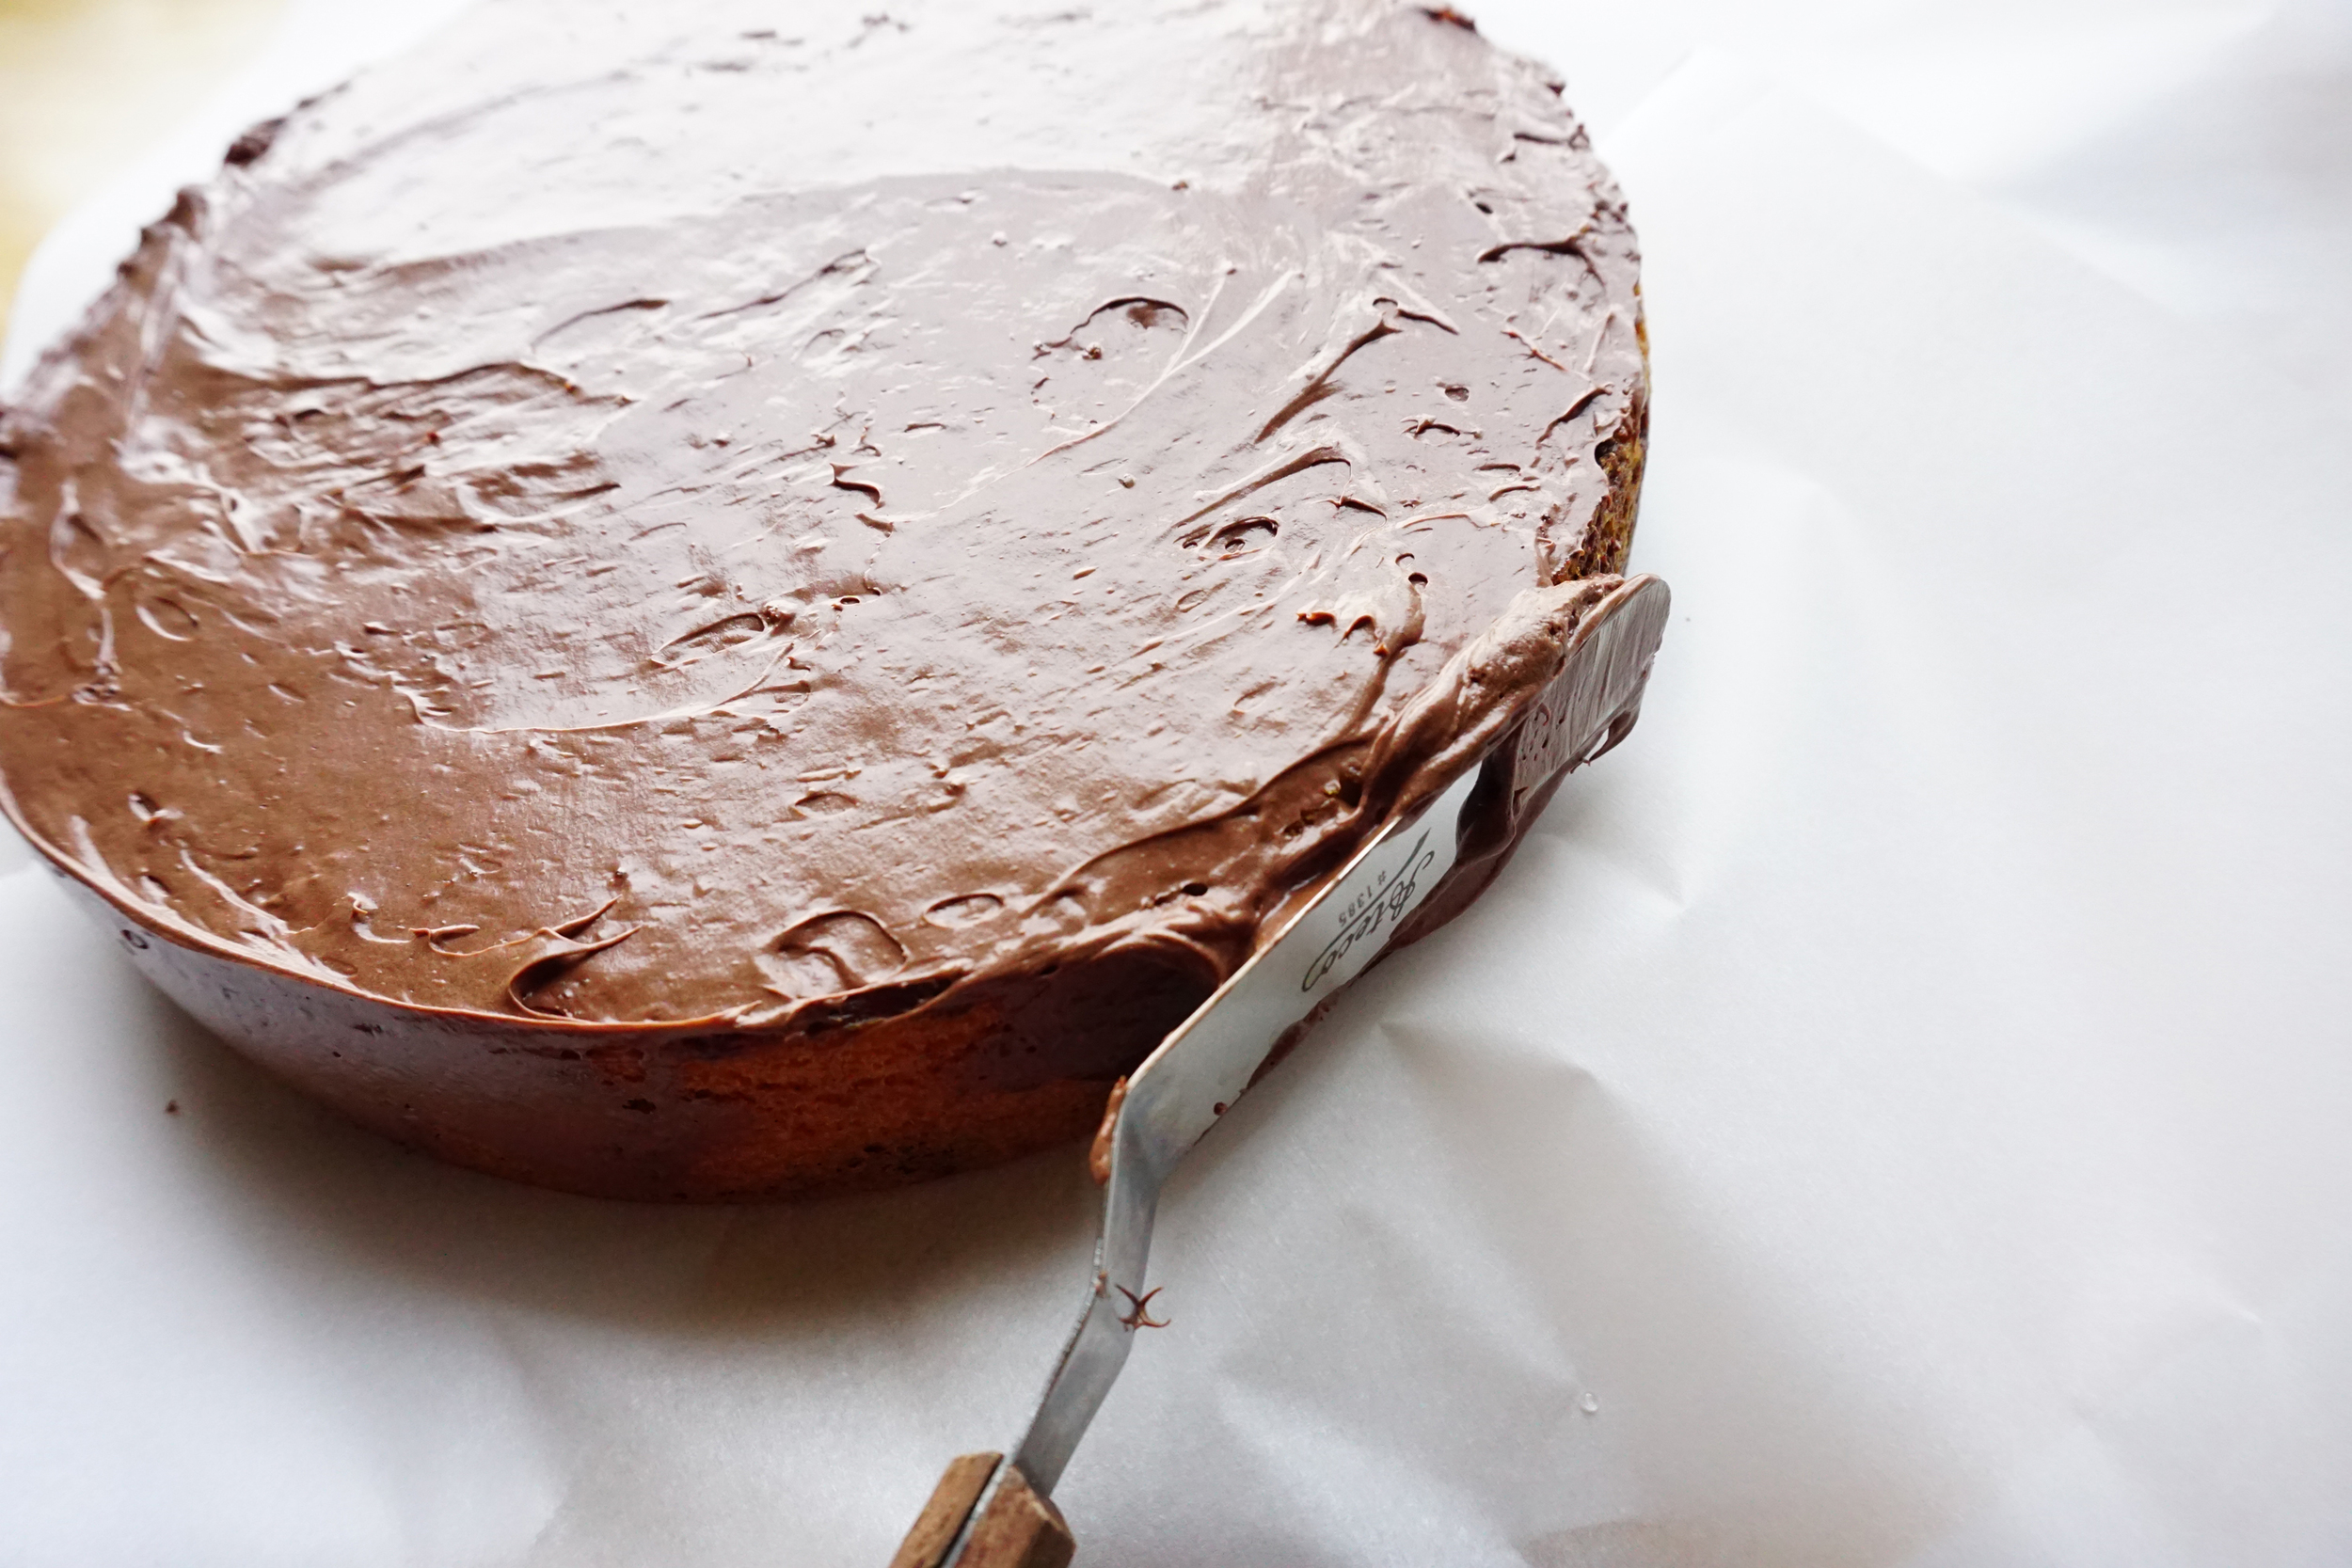
- Carefully place the other cake layer on top of the bottom layer.

Isn’t it gorgeous? Decorate as you wish.


Thanks for reading! I know this recipe was a little long-winded, but I think it’s such a fun and versatile way to dress up regular ole boxed cake mix. You can dye white cake mix any color, really, and use it for any number of holidays, birthdays, or special events.
It’s amazing how the batter rises up and creates a beautiful marbling effect. GO GIANTS!